Tuesday, December 30

Ham | Beans | Cornbread


Living with only two people (plus a cat and a dog), means there are always plenty of leftovers in the refrigerator. Sadly, none of us, except maybe the dog, are really all that into leftovers. So when the holiday's come around and I feel the urge to cook giant turkeys and bake entire hams I have to get creative when the - literally - pounds of meat we have leftover. 

Growing up, ham, beans, and cornbread was one of my favorite ways mom disguised the leftover hams from Christmas and Easter. To carry on the tradition (and in honor of her birthday today!) I present to you the most delicious beans with ham on earth. 

Ingredients

1 lb of white beans - cannellini or great northern
2 1/2 quarts of water
3-4 lbs of ham hocks or shanks
2 teaspoons (or more) of Italian seasoning
2 tablespoons of olive oil
1 medium onion, diced
2-3 ribs of celery, chopped
3 carrots, chopped
3-4 garlic cloves, minced
salt and pepper to taste
fresh parsely

Preparation Instructions 

Fill a large pot with enough water to cover the beans and bring to a boil. Turn off the heat and add your beans. Allow beans to soak overnight (or for at least 8 hours). 

Make your ham broth by putting the shanks or hocks into a large pot and covering them 2 1/2 quarts of water. Add the Italian seasoning and heat on high until the water comes to a simmer. Lower the heat, maintaining a simmer, and partially cover for about an hour. 

About 10 minutes before the ham broth is complete, heat olive oil in a small pan and saute the onion and garlic on medium heat. At this point, you may want to go ahead and pull your ham off the bone (discard the bone) and shred your ham in the pot.

Once the onion, garlic, and ham is ready add all the vegetables as well as your soaked beans to your pot.  Cook for another 40 minutes to an hour, uncovered, until the vegetables are soft. Add salt and pepper to taste and more water if needed. Serve with chopped fresh parsley, and of course, cornbread.

Three Easy Bark Recipes for any Celebration!


I have never met a short cut I didn't like, and for any celebration homemade bark feels like the ultimate short cut. Not only is bark the perfect excuse to eat straight chocolate. You can make these three different varieties in under 2 hours (including the hour they set up in the fridge while you take a shower/check instagram/walk your dog/whatever).


Chocolate Peanut Butter Bark with Toffee

1 1/2 cups milk chocolate chips
1 1/2 cups peanut butter chips
1 teaspoon shortening
1/2 cup Skor toffee bits 

First, line a cookie sheet with parchment paper.

Then, in a microwave safe bowl, melt the milk chocolate chips on medium heat for about 1 minute, check the chocolate by stirring it, if not melted you can turn on again for 30 seconds. Continue to check and stir again until chocolate is smooth.

In a second microwave safe bowl combine the shortening and peanut butter chips and microwave on medium heat for 1 minute, check the peanut butter chips by stirring it, if not melted you can turn on again for 30 seconds. Repeat as necessary, until smooth.

Spoon the chocolate and peanut butter alternately in lines on your cookie sheet lined with parchment paper. Continue until all the melted chocolate and peanut butter is on the sheet. To create a marbled effect, pull a butter knife through the mixture.

Sprinkle the skor toffee bits on top, and place the cookie sheet in the fridge for about an hour to set up. Once bark is hard, remove from the fridge and break into pieces.

Recipe adapted from the Cravings of a Lunatic Blog


Dark Chocolate and Coffee Bark with Sea Salt Roasted Almonds

300 grams of dark chocolate
2 tbsp strong, dark coffee
1/2 cup roasted almonds, roughly chopped
Sea salt to taste
Line a baking sheet with silver foil.

Place almonds on baking sheet, sprinkle with sea salt, then roast at 400 for 20 minutes, or until fragrant and darker in color. Roughly chop once cool or room temperature.

Finely chop the chocolate and melt it in a double boiler. I used a bowl placed on a pot of boiling water to do this. When the chocolate is nearly all  melted, add the coffee and stir well. Then mix in about 1/4 cup of the nuts.

Pour the chocolate and nut mixture on to the silver foil lined baking sheet (I used the same one used for the almonds). Spread it into a layer of about 1/2 cm thickness. Add the remaining almonds on top. Then allow mixture to harden in the refrigerator for about an hour.  

Once hard, break it into small pieces and store in an airtight container.

Recipe adapted from the blog, Love Food Eat


Chocolate Cake Batter Bark with Sprinkles 

8-10 ounces high quality dark chocolat
12-14 ounces high quality white chocolate
3 teaspoons yellow cake mix
sprinkles of your choice

Melt dark chocolate either in the microwave or a double boiler. Line a baking sheet with parchment paper and pour chocolate on. You can smooth it with a spatula to the thickness you desire. Stick in the freeze for 20 minutes.

Melt while chocolate. Whisk in cake mix slowly, stirring well until no lumps remain. Let it set for 3 full minutes (or at least until it slightly thickens). Remove baking sheet with chocolate from the freezer and immediately pour white chocolate on top. Sprinkle on sprinkles. Place in the refrigerator for about an hour to harden. Once hard, break into small pieces.

Recipe adapted from the blog, How Sweet It Is.

Thursday, November 13

Browned Butter Bourbon Banana Bread


My grandmother makes the best bread on earth. Everything from her sourdough to her zucchini bread-they have always been my favorite thing she makes.
 
Last weekend, however, I decided to venture out and try a new banana nut bread recipe. Something about the caramelized diced bananas and bourbon in this recipe caught my eye. Although the flavor was wonderful and it was cinch to make, I find it hard saying any bread is better than my grandma's. 
 
Since I believed there is a place for both the fun new recipes as well as those tried and true, I have included here my grandmother's famously delicious banana nut bread recipe in addition to my new browned butter bourbon banana bread recipe from Food 52. Hopefully you enjoy baking (and eating!) these breads as much as I do!
 
Browned Butter Bourbon Banana Bread

2 cups flour
1/4 teaspoon baking soda
1/2 teaspoon baking powder
1/2 teaspoon salt
8 tablespoons butter
3 very ripe bananas
2 large eggs
3/4 cup plus 1 tablespoon, brown sugar, divided
1 teaspoon pure vanilla extract
1 tablespoon bourbon
1/2 cup buttermilk
2/3 cup toasted, chopped pecans

Preheat oven to 350° F. Grease only the bottom of a standard size loaf pan with butter or nonstick cooking spray. Combine flour, baking soda, baking powder, and salt in a medium-sized bowl. Set aside.

Melt butter over medium heat in a small, heavy-bottomed pot. Cook until it begins to brown, but not burn; it will smell nutty and fragrant. Remove from heat and let cool for 10 minutes.

Peel and dice one banana. Mash the remaining two bananas in a small bowl; set aside. Heat 1 tablespoon of the brown sugar in a small skillet over medium heat until it begins to melt and turn golden. Add diced banana pieces and sauté until well coated and caramelized. Remove from the pan and set aside.

Beat eggs on medium speed in a stand mixer. Add the remaining brown sugar and beat until foamy and combined. Add the mashed bananas, cooled browned butter, vanilla, and bourbon; beat until mixed well. Scrape down sides of bowl again with rubber spatula.

On low speed, pour in 1/3 of the flour mixture. Increase mixer speed to medium and mix until just blended. Pour in 1/3 of buttermilk and beat until just blended. Repeat this process with remaining flour and buttermilk. Fold in pecans and caramelized banana pieces. Pour into prepared loaf pan and bake for 55 to 60 minutes, until a toothpick inserted in center comes out clean.

My Grandmother's Banana Bread

Note: She would always suggest doubling the recipe and freezing half for later.

2 cups all-purpose flour
1 teaspoon baking soda
1/2 teaspoon salt
3 medium bananas (dull yellow and flecked)
1 stick of butter
1 cup sugar
2 egggs
1/2 cup chopped walnuts or pecans
 
Sift flour, soda, and salt together in a medium bowl and set aside. Mash bananas and whip until light. In a separate bowl, cream butter and sugar, then beat in eggs one at a time. Stir dry ingredients, bananas, and nuts into the creamed mixture. Turn into a greased loaf pan and bake 1 hour at 350 degrees.


Tuesday, November 11

Pecan Pie Bars


If you are looking for a simple way to say "Thanks!" this recipe would be a great place to start.

In two weeks we will be celebrating Thanksgiving of which Pecan Pie is obviously a holiday staple for many families.  Feeling inspired by the season and upcoming gift-giving,  I tried to think of how I might turn this recipe tradition into something that could easily be dropped off and enjoyed by friends, co-workers, and family. These bars are plenty gooey, sweet, and nutty - just like your favorite Pecan Pie. Enjoy!

1/2 cup butter
3/4 cup light corn syrup
1 1/4 cups milk
4 eggs, separated
1 1/4 cups packed brown sugar
1 tbsp water
1 cup flour
1 tsp vanilla extract
Pinch of salt
1 1/2 cups chopped pecans, divided
Caramel sauce (optional)

Grease an 8 x 8 pan with butter and sprinkle the bottom of the pan with 1 /2 cup of chopped pecans. Preheat the oven to 325 degrees F.

Melt the butter and set aside. Combine the milk and corn syrup in a bowl. Heat in the microwave or on the stove until lukewarm. Stir to dissolve the corn syrup.

Beat the egg whites until stiff peaks form. In another bowl, add the egg yolks to the brown sugar and whisk until light in color, about two minutes. Add vanilla and stir.

Add the water and melted butter to the brown sugar mixture and whisk again. Add the flour and mix until smooth. Then whisk the milk and vanilla extract mixture into the batter.

Incorporate the egg whites gradually, slowly using your whisk to combine them into the batter. If some egg whites are still visible that's okay.

Pour into the prepared pan and sprinkle the rest of the pecans over the surface of the cake. Place in the oven for about 50 minutes. Let cool before cutting into squares and drizzling with caramel sauce.  

Recipe adapted from the Foodness Gracious Blog

Thursday, October 30

New Orleans Style BBQ Shrimp


A total misnomer. The uninitiated, likely mislead. These shrimp are neither cooked on a BBQ grill nor with BBQ sauce. 

N.O.B.B.Q for short is probably my favorite style of shrimp. It's good and messy! Although this recipe says it feeds four, my husband and I can put down three whole pounds between the two of us. I usually just pair these tangy shrimps with crusty bread - wonderful for dipping in the sauce!

1 cup unsalted butter
½ cup olive oil
¼ cup Worcestershire sauce
4 garlic cloves, minced
1 teaspoon salt
1 teaspoon freshly ground black pepper
¼ teaspoon cayenne pepper, or to taste
1 bay leaf
½ teaspoon dried thyme
½ teaspoon dried rosemary
½ teaspoon dried oregano
Dash of hot pepper sauce
1 lemon, thinly sliced
3 pounds large shrimp* (21-25 count or larger)

Preheat the oven to 400 degrees. In a dutch oven over low heat, melt the butter with the olive oil. Add the Worcestershire sauce, garlic, salt, black and cayenne peppers, bay leaf, thyme, rosemary, oregano, hot sauce, and lemon slices. Add the shrimp and stir to coat well with the sauce. 

Place in the oven to bake for 20-minutes, or until the shrimp are pink and the tails just slightly curved.  Baste with the sauce occasionally. Remove the bay leaf from the sauce, then spoon the shrimp and sauce into bowls, and serve. Leftovers are perfect for po'boy sandwiches.

*Peeled and deveined shrimp may be used, but flavor and ritual will be sacrificed.

Adapted from the cookbook: Screen Doors and Sweet Tea

Tuesday, October 28

{Link Love} The Summer of Okra


This summer was the summer I found okra. I mean realllly found okra. Although I have fried okra several million times, I mostly did so because that was all I knew. Having only recently branched out to try new recipes, I have been surprised to discover how well okra accompanies foods I make all the time like rice and shrimp. 

Here are a few recipes I have saved and though I'd share! I'd love to hear your thoughts on okra. Do you have a favorite dish?
 
Shrimp and Okra Hush puppies
Pan Fried Okra, Shallots, and Tomatoes over Grits

Black-Eyed Peas & Okra

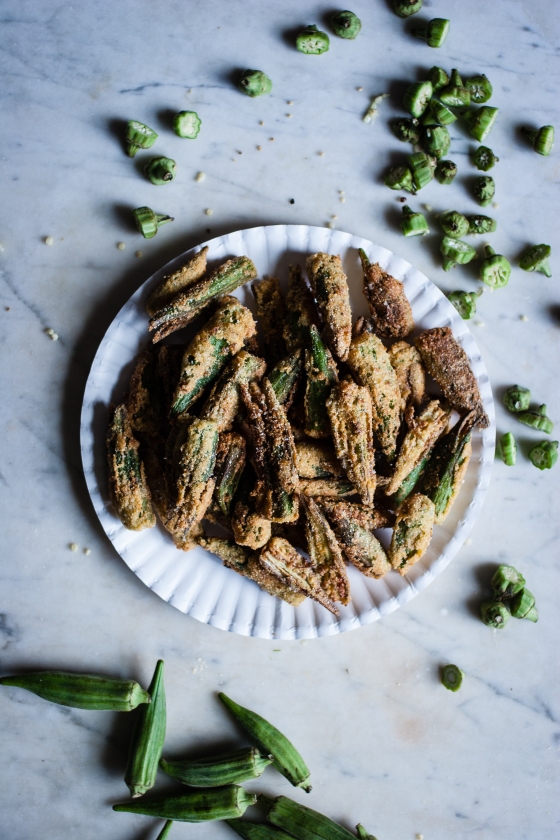
Smashed Cayenne + Cornmeal Crusted Fried Okra | for the love of the south
Smashed Fried Okra
Chicken and Sausage Gumbo photo
Chicken and Sausage Gumbo
Skillet Roasted Okra and Shrimp
Lamb Chops with Roasted Okra, Zucchini, Lady Peas and Soffrito
Lamp Chops with Roasted Okra
Stir-Fried Okra with Shallots, Chile, and Ginger photo
Stir-Fried Okra with Shallots, Chile, and Ginger

Click photo caption for a link to each recipe!

Sunday, October 19

Pumpkin {Doughnut} Muffins


It wouldn't be October without a pumpkin recipe. We have a had gorgeous weather this past week! The temps are starting to drop at night and you definitely need a light sweater in the mornings. I am finally in the mood to celebrate fall and share my very favorite pumpkin recipe.

Muffins are perfect for my busy mornings trying to get out the door to work. I will whip them up over the weekend in order to have a little treat I can quickly grab and even munch on the in car. Although I would love to be one of those people who makes time for a sit down breakfast each morning, I find myself multitasking with breakfast either at my desk or in the car quite often.

What makes these muffins the perfect breakfast is certainly not that they are healthy. These babies are brushed with butter and rolled in cinnamon sugar! The plus side - I guess we can call it that - being they are so dense and filling you only need to eat one. 


Maybe you are already familiar with doughnut muffins, but just in case you are not it is essentially a cake doughnut recipe presented to you in muffin form. Martha Stewart either started this whole doughnut muffin thing or was just the one to make them popular - I am not sure. Here I have adapted her recipe, changing up the spices by adding ginger and allspice, to make them even more savory and I think a little more balanced. I know you are going to love this sticky, lick-your-fingers messy, pumpkin goodness! 


For the batter

10 tablespoons (1 1/4 sticks) unsalted butter, room temperature, plus more for pan
3 cups all-purpose flour (spooned and leveled), plus more for pan
2 1/2 teaspoons baking powder
1/4 teaspoon baking soda
1 teaspoon coarse salt
1 teaspoon ground cinnamon
1/2 teaspoon ground ginger
1/2 teaspoon allspice
1/3 cup buttermilk
1 + 1/4 cups pure pumpkin puree
1 + 1/2 teaspoons vanilla extract
3/4 cup light brown sugar
2 large eggs
For the sugar coating
3/4 cup granulated sugar
2 1/2 teaspoons ground cinnamon
1/4 cup (1/2 stick) unsalted butter, melted

Preheat oven to 350 degrees F. Butter and flour one 12 standard muffin pan.

In a medium bowl, whisk together flour, baking powder, baking soda, salt, cinnamon, ginger, and allspice. In a separate small bowl whisk together buttermilk, pumpkin and vanilla. In another large bowl beat butter and brown sugar together until light and fluffy 2-3 minutes on medium speed. Beat in eggs one at a time. Scrap down the sides of the bowl. 


To the butter, brown sugar, and eggs, add the flour mixture in three additions alternating with two additions pumpkin mixture beating on low speed just until combined.
 

Spoon 1/3 cup batter into each muffin cup and bake until a toothpick inserted in center of a muffin comes out clean 24-26 minutes.

Meanwhile in a medium bowl whisk together sugar and cinnamon for coating. Remove muffins from oven and cool in pans on wire racks 10-20 minutes.  Brush one muffin at a time with butter then toss/roll coat in the sugar mixture until completely coated. Place on wire racks and cool completely. Best eaten within 24 hours. 


Recipe adapted from Martha Stewart

Monday, October 13

Homemade Chicken Noodle Soup


It feels like I have been on the verge of a cold for two weeks. My symptoms have gone back and forth, worse then better. Well somewhere between working 7 days a week, not getting any sleep, and eating like shit I have become sick. Inevitable, really. I'll be the first one to say it: I really should be taking better care of myself. 

After calling in to work I slept until 1:30pm. It was awesome. Then, I ran to the store to get a roasted chicken and made up a giant pot of chicken noodle soup. After tossing some things into my pot, I indulged myself with a LUSH bath bomb. I must say... A hot bath and bowl of soup can be pretty magical. 


My favorite chicken soup recipe is from Alice Water's The Art of Simple Food. It was over a year ago, I featured her Chicken Stock on the blog. I do like to keep chicken stock in my freezer all the time. It's perfect for days like today. Although I usually add parsnips and celery to my soup, today I wasn't in the mood for any extra chopping so I just stuck with basic carrots. Not only is this soup light and full of flavor, making it only dirties up one pot, cutting board, knife, and spoon. You certainly can't beat that when feeling under the weather. 

Ingredients:

3 quarts of chicken stock
2 cup of chicken, shredded
2 cups of egg noodles
1 large onion, diced
5-6 small carrots, diced
2 stalks of celery, diced
2-3 small parsnips, diced
salt
fresh dill

In a heavy-bottomed pot, place your onions, vegetables, and salt. Cover with half the chicken broth and cook at a simmer until the vegetables are tender. 


While your vegetables simmer, shred your chicken from the bones. Picking out any skin or fat with your fingers.   


Once the vegetables are soft, add the rest of your broth, noodles, and chicken. Cook until the noodles are done. Taste and adjust flavor with salt as needed. 

Just before serving, stir in chopped dill.


This recipe was adapted from Alice Water's The Art of Simple Food.

Monday, October 6

Brie and Pear Salad with Cranberries and Cashews


Let me start off by saying, I love to be busy. One thing I worried about most when I found out we were moving to a new city was being bored or lonely. Since starting my new job, neither of those things have happened. Not even close! Each day I go to work excited to be with the people who are there and leave busy with ideas and plans for the next day.

Like with any new job I am adjusting to a new breakfast and lunch routine. Although I get to work hours earlier than I used to I try to force myself to eat something healthy for breakfast - usually toast (duh), Greek yogurt, or oatmeal. For lunch I used to take leftovers, but with Sam working nights I'll admit my dinner menu has gone by the way-side. Knowing I would just eat junk all-day if I didn't plan ahead, I started making jar salads again. 

Each Sunday night, I make up three or so jars of salads to get my week started off right. This little habit has become such a blessing. Not only is each jar a ready-to-go meal, it's much healthier than the snacks I have in my desk :)

I typically don't love pears, but they give this dish a great kick. Plus, the Dijon vinaigrette will be a recipe you keep around house. We just about always have some in the fridge!

If you have never made a salad in a jar, you will want to give the assembly some thought:
  1. Start with your dressing on the bottom of the jar
  2. Add hearty ingredients like raw veggies, nuts, or dried fruits
  3. Pile on softer ingredients like fresh fruit and cheeses
  4. Then pack in your greens
This method should help keep your greens fresh and tasty for several days. I have kept my jars for up to five days, but have found this particular salad is best within three.

For the dressing:
1/4 cup balsamic vinegar
2 Tbsp mild agave nectar
1 Tbsp Dijon mustard
1/4 cup olive oil
1/4 tsp kosher salt
1/4 tsp fresh black pepper

For the salad:
4 cups 50/50 mix
1 ripe pear, thinly sliced
2-3 oz ripe brie cheese, sliced
Roasted, unsalted cashews
Dried cranberries

To make the dressing, add all ingredients in a small jar. Shake vigorously until emulsified. 

To assemble your salad, pour 2-3 tbs of dressing into the bottom of your jars. Add the cashews, cranberries, pears, and brie followed by your greens packed in tightly.

Thursday, September 11

Agave Margartias


One of our favorite quick dinners is Mexican food! It usually consists of some sort of meat, tortillas, peppers, and cheese. Sometimes we spice things up with avocados, radishes, corn, beans, etc. Fajitas, nachos, burritos, or tacos - any shape or form - the same basic ingredients can be prepared in so many yummy ways!

Mexican food night is not only totally scrumptious, it is really the best excuse I can think of for margaritas.  Typically, margaritas are full of calories when you get them at the bar, but homemade margaritas with fresh lime juice and agave nectar for sweetener are much easier on the waist line. I first fell in love with the "skinny" margarita at Local Lime in Little Rock, AR, and figured it was time to start making my own.


Local Lime uses reposado tequila, lime juice, agave nectar, with salt on the rim, although I prefer platas (or silver) tequila. One of my favorite budget tequilas is Altos. I first came across Altos while on our honeymoon in Mexico, but couldn't find it in the states until we moved to Tampa. It's affordable and smooth enough to enjoy on the rocks if that's your thing. 

Of course, tequila is one of the most important ingredients in Margaritas, the sweetener should not be forgotten. We have been using Milagro's Organic Agave Nectar for a couple years and really love it (but any agave nectar will do the trick)!


Agave Margarita:

2 parts tequila to 1 part fresh lime juice
3/4 parts agave nectar
a sprinkle of salt (if you want more, coat half the edge of the glass)
lime wedge

Mix ingredients using a martini shaker and pour over ice.


Monday, August 18

One-Pan Roasted Chicken with Root Vegetables


Anyone else get caught up watching Cook's Country?

I love Chris Kimball. His empire has brought us the famed publications Cook's Illustrated, and of course, Cook's Country Magazine. Kimball, along with PBS, are also the brains behind some of the best shows including American's Test Kitchen, as well as Cook's Country, and even the great home renovation show, This Old House. Thanks to WUSF here in Tampa, I am able to keep up with both of Kimball's cooking shows (among others) for free!

Needless to say at this point, I was watching Cook's Country the other night and knew I just had to try out this recipe. I have roasted chicken with carrots and potatoes several times, but never had I ever added brussels sprouts! Sam and I both really love brussel sprouts. We eat them all the time (usually with bacon!) as I try to serve something green alongside everything I make at home. With this recipe, you don't have to mess up a pot and do green beans on the stove or even mess with throwing together a salad. The greens go straight into the dish! It's perfect!

So while I was watching TV,  I didn't write down anything exact. Thanks to allrecipes.com I was able to track down the recipe! I have no doubts that it will be added to your dinner rotation too!

Ingredients:

1 cup brussels sprouts, trimmed and halved 
1 cup red potatoes, cut into 1-inch pieces
1/2 cup shallots, peeled and halved
1 cup carrots
6 garlic cloves, peeled
4 tsp minced fresh thyme
1 tbs olive oil
2 tsp fresh rosemary
1 tsp sugar
Salt and pepper
2 tbs unsalted butter, melted
3 1/2 lbs bone-in chicken, quartered
Adjust oven rack to upper-middle position and heat oven to 475 degrees. Chop Brussels sprouts, potatoes, shallots, carrots, and garlic. Toss vegetables with 2 teaspoons thyme, oil, 1 teaspoon rosemary, sugar, ¾ teaspoon salt, and ¼ teaspoon pepper together in bowl.

Make an herb butter to brush on the chicken in second bowl. Combine melted butter, remaining 2 teaspoons thyme, remaining 1 teaspoon rosemary, ¼ teaspoon salt, and 1/8 teaspoon pepper.

Pat the chicken dry with paper towels and season with salt and pepper. Place vegetables in single layer on rimmed baking sheet, arranging the brussels sprouts in center and potatoes towards the rim. Place chicken, skin side up, on top of vegetables, positioning breast pieces in the center and leg and thigh pieces around perimeter of the baking sheet.


Brush chicken with herb butter and roast until breasts register 160 degrees and drumsticks/thighs -register 175 degrees, 35 to 45 minutes, rotating pan halfway through cooking. Transfer chicken to serving platter, tent loosely with aluminum foil, and let rest for 5 to 10 minutes. Toss vegetables in pan juices and transfer to platter to serve with chicken.


This one-pan roasted chicken with root vegetables first appeared in the February/March 2012 issue of the Cook's Country Magazine

Monday, August 11

Shrimp with Fresh Corn Grits


If shrimp and grits are available on a menu, you know that's what I'm ordering! From the Faded Rose in Little Rock, AR to Ella's in Tampa, FL I have favorites all over the place. Bon Appetit Magazine always has the best recipes, so when I wanted to make my own I started there - with this old recipe from September 2011. It was fine, but still not as good as what I could get down the hill at Faded Rose. 

Then last month, I saw their recipe for Shrimp with Fresh Corn Grits and stopped dead in my tracks. It was simple, straightforward, and classic. Last week we tried the new recipe and loved it so much I made it two nights in a row! 

To get the awesome flavors in this dish, you'll primarily being using seasonings you already have in the kitchen. It may be a little late in our relationship to mention this - but I have a thing for pantry staples. I love keeping a well stocked pantry so that when I set out to grocery shop I usually just have to pick up the vegetables and meat (if we are using any). Living in Florida, I am getting spoiled on the great shrimp and seafood we have access to - not to mention the farmer's market that is open seven days week for produce! It's going to be tough if we ever have to move from here!

Here, is the Bon Appetit recipe from July 2014 with the few modifications I made! Enjoy!

Shrimp with Fresh Corn Grits


Ingredients:

3 ears of corn, husked
2 cups low-sodium chicken broth
1 cup whole milk
¾ cup grits (not instant)
2 tbs unsalted butter
Salt and freshly ground black pepper
¼ cup olive oil
2 garlic cloves, thinly sliced
½ tsp dried oregano
½ tsp smoked paprika and of cayenne pepper
1½ pound large shrimp, peeled
Fresh chives (optional, for serving)

Grate 2 ears of corn over a medium bowl, catching as much juice as possible; set aside. Cut kernels from remaining ear of corn into another medium bowl; set aside.


Bring broth, milk, and 1½ cups water to a boil in a medium saucepan. Reduce heat so liquid is at a simmer and gradually whisk in grits. Simmer, whisking often, until grits are very tender, 20–25 minutes. Mix in butter and reserved grated corn; season with salt and pepper.


Fifteen minutes after you have added grits to saucepan, heat oil in a large skillet over medium-high heat. Cook garlic, oregano, and paprika, stirring, until fragrant, about 30 seconds. Add reserved kernels and cook, stirring occasionally, until golden brown and beginning to pop, about 3 minutes.


Add shrimp and cook, tossing occasionally, until cooked through, about 4 minutes.


Serve shrimp and corn over grits topped with chives.


Recipe Source: Bon Appetit Magazine